
Using Chat
Starfish's chat interface is where you interact with AI models, run tools, and get work done. This page covers the core mechanics.
Interface Layout
The chat screen has three areas:
- Sidebar (left) -- your session list, navigation, and settings link.
- Message area (center) -- conversation history, streaming responses, and tool call results.
- Composer (bottom) -- where you type messages and control model settings.
Chat and Developer modes
The switch at the top of the sidebar toggles between Chat (formerly Simple) and Developer. Chat keeps the day-to-day experience simple -- outcome-based model picks, a quiet safety check before changes. Developer exposes the full model catalog, thinking effort, the command menu, the right-side panel, and the approval selector.
Switching modes opens that mode's chat -- the last one you were in, or a new one. It does not convert the chat you are currently in.
Sending Messages
Type your message in the composer and press Enter to send. You can also use Cmd + Enter. Responses stream in real-time -- you see tokens appear word-by-word as the model generates them.
While the AI is responding, the send button is replaced by a Stop button next to the message box. Clicking it cancels the current generation and marks any in-flight tool calls as interrupted.
Message Queue
You don't need to wait for a response to finish before typing again. While the AI is working, type a follow-up and click the clock button to queue it for later -- it fires after the current response completes.
Queued messages appear in a collapsible "N Queued" panel above the composer. Each queued message has two actions:
- Edit -- pulls the message back into the composer for changes.
- Delete -- removes the queued message.
The first queued message is synced to the server, so it fires even if you navigate away from the session.
Steer (Mid-Turn Course Correction)
While the AI is responding, you can send a steer message to redirect it without stopping the current response. Type your correction and click the send button (the arrow beside the clock) to fire it now. This is useful when you see the AI heading in the wrong direction and want to course-correct immediately.
The steer is delivered to the model as your new direction at its next step, so the AI adjusts its approach without losing the work already done.
Auto-Continue
If the AI appears to have stopped mid-task (e.g., it says "let me do that now" but doesn't follow through), Starfish automatically sends a continuation prompt and merges the accumulated text and tool results into a single response to keep the conversation clean. The number of continuations allowed depends on the turn's inferred profile -- typically once, with more headroom on research, technical, and Developer work.
Sessions
Each conversation is a session. Sessions are listed in the sidebar and persist across app restarts.
Creating a new session
Click the New Chat button at the top of the sidebar, or press Cmd + N. The sidebar also has links for:
- Meetings -- record a call and get notes.
- Timeline -- reconstruct a client's history.
- Media -- image and video generation sessions.
The sidebar's session list changes to match the section you're in (chats, generations, or video clips).
Pinning sessions
Right-click a session in the sidebar (or click the three-dot menu) and select Pin. Pinned sessions stay at the top of the list in a separate "Pinned" section.
Renaming sessions
Right-click a session and select Rename. An inline text field appears -- type the new name and press Enter.
Deleting sessions
Right-click a session and select Delete. The session is removed immediately.
Background sessions
If you navigate away from a session that is still running, it continues on the server. The sidebar shows a spinning indicator next to any session that is still active. Navigate back to reconnect and see the results.
Sessions with pending permission prompts show an amber left border and "Needs input" label in the sidebar.
Attaching a chat to a project or folder
The chat input has a Workspace picker chip above it. Click it to choose a project (and optionally a folder) for the next chat you start. The picker is sticky — once you pick a target, follow-up new-chats default to it until you clear the chip.
For an existing chat, hover its row in the sidebar, click the three-dot menu, and choose Move to… → <Project> or <Project> → <Folder>.
When a chat is attached to a project, the system prompt picks up the project's instructions, knowledge document, and uploaded knowledge files. See Workspace for the full feature.
Prompt History
Press Arrow Up in the composer to scroll through your previous messages in the current session. Press Arrow Down to go forward. The history stores up to 50 messages per session.
Spelling, Grammar & Polish
The composer checks your writing as you type. Mistakes get an underline; click one to fix it, ignore it, or add the word to your dictionary. Checking runs on your Mac -- your text never leaves it. Open Settings → Appearance → Spelling & grammar to turn checking on or off, choose which categories run (spelling, grammar, punctuation, capitalization, style), and set your English dialect.
The pen button beside the mic is Polish (Cmd + Shift + P). It rewrites either the text you have selected or, if nothing is selected, the whole draft, then shows a preview you can accept or discard.
Voice Input
Click the microphone button in the composer toolbar to start dictating. Words appear as you speak, and Enter (or the send button) transcribes and sends; the X discards the recording.
Voice input uses your system microphone. On first use, macOS may prompt you to grant microphone access.
You choose the engine in Settings → Voice:
- Cloud transcription (the default) sends audio off-device to the AI Gateway. Pick from GPT-4o Transcribe (best accuracy), GPT-4o Mini Transcribe (fastest), Whisper 1, or Fish Audio Transcribe 1.
- On-device (Parakeet) keeps audio on your Mac and runs offline. It needs a one-time ~460 MB model download, which starts from Settings or the first time you click the mic.
Attachments
Attach files to your message using the toolbar buttons or by dragging files onto the composer:
- Images -- browse, paste from clipboard, or drag and drop. Supported formats include PNG, JPEG, GIF, and WebP.
- Text files -- click the attachment button to browse. Supports 40+ file extensions (.ts, .py, .json, .md, etc.).
- PDFs -- uploaded and processed for the AI to read. A small cloud badge indicates the PDF has been uploaded for persistence.
Attachments appear as inline previews below the composer with a remove button on each.
@Mentions
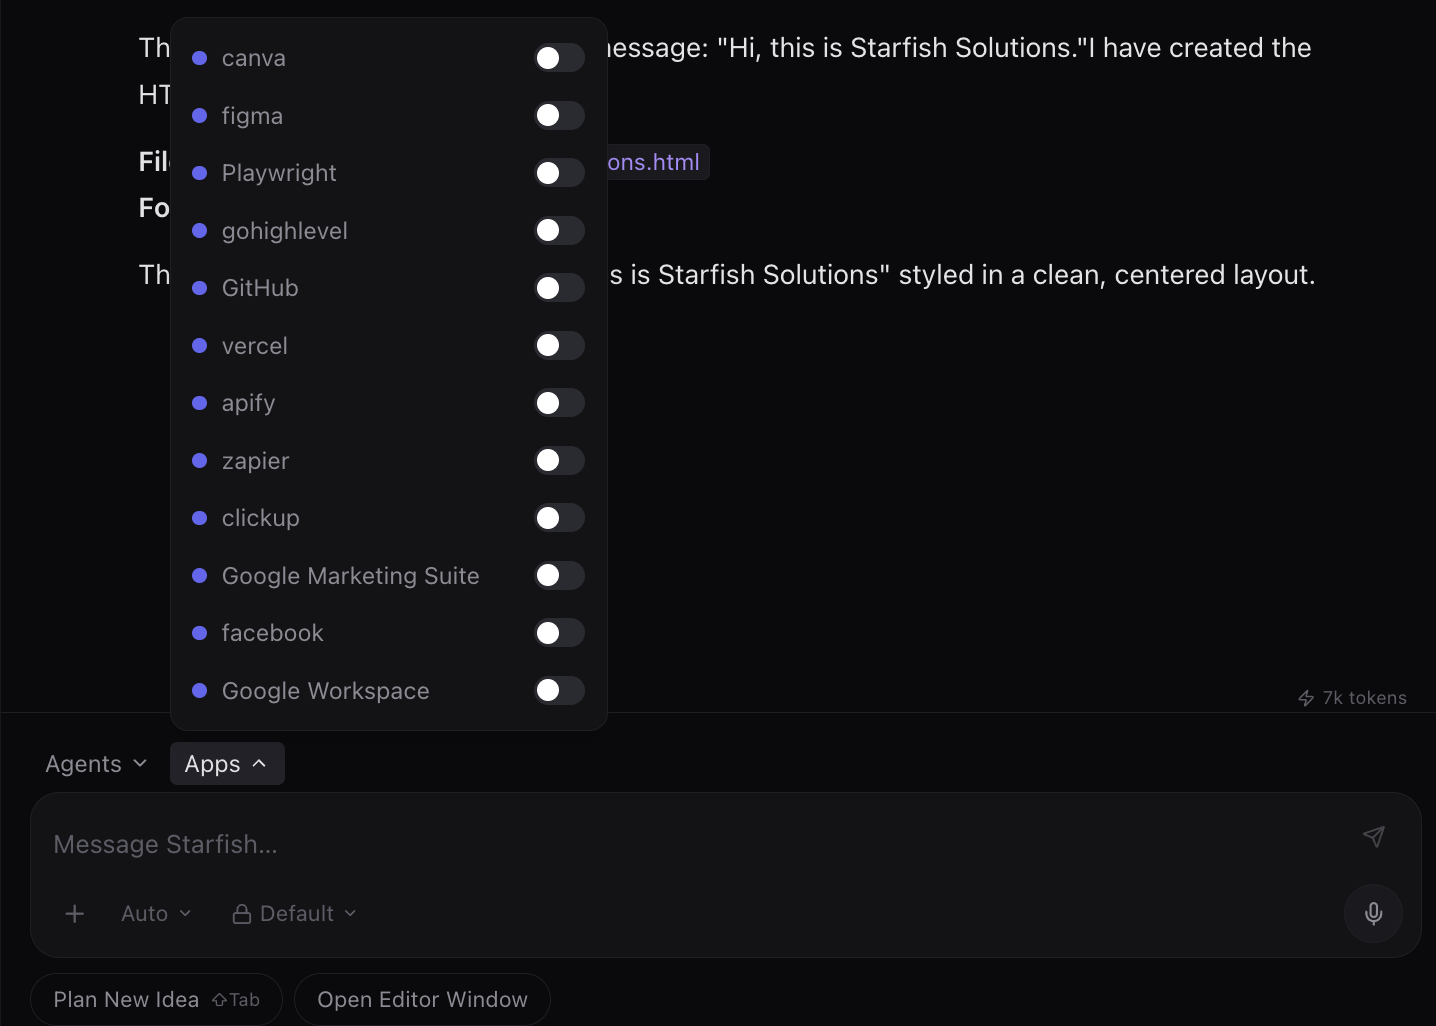
Type @ in the composer to open the picker, or click the + button. The picker has tabs:
- Files -- choose a file from this Mac to attach to the message.
- Apps -- reference a connected integration to direct the AI to use it. Selecting an app activates it if it isn't already active.
- Create (Chat mode) -- start an image, video, or Timeline.
Select an item to insert it as a mention at the cursor position. In a sent message, @app mentions render inline as the app's name with its logo.
Slash Commands
In Developer mode, type / in the composer to open the command menu. Commands include:
- /plan -- enter Plan Together to plan before executing.
- /builder -- open the inline Prompt Builder panel above the composer.
- /editor -- toggle the right-side panel (browser, terminal, files, artifacts, plan).
- /permissions and /approve ask|auto|full -- set how actions are approved.
- /compact [focus] -- condense the conversation and keep going.
- /image and /video -- make the next message generate media.
- /cost, /clear, /agents, /project, /timeline, /help -- cost summary, new chat, agents, project directory, Timeline, and help.
Toolbar Controls
The composer toolbar reflects your current work mode:
- Agent selector -- in Chat mode, pick the agent this chat runs as.
- Model picker -- Chat mode offers Smart Auto, Light/Balanced/Deep, and your named models; Developer mode lists the full catalog plus a Thinking effort control. See Models & Providers.
- + button -- open the Create / Files / Apps picker (see @Mentions).
- Approval selector (Developer mode) -- choose Ask for approval, Approve for me, or Full access. See Permissions.
Message Rendering
AI Responses
AI responses render full markdown with syntax-highlighted code blocks, tables, lists, diagrams, charts, and inline formatting. Links show the destination site's icon beside the text. In Chat mode, clicking a link opens a dialog to choose your default browser or the built-in browser panel; in Developer mode links open in your default browser directly.
Selecting Text in a Reply
Select any text in a reply and a small toolbar appears with three actions: Ask Starfish (starts a follow-up about the selection), Explain (asks for an explanation), and Copy.
Conversation Rail
On a long chat, a thin rail appears down the left edge with one tick per message you sent. Hover a tick to preview that prompt and the start of its reply; click it to jump there. Ticks near your pointer lengthen, so the rail is easy to scan.
Thinking Blocks
When a reasoning model is active (Claude Sonnet 5, GPT-5.6 Luna, etc.), thinking blocks appear as expandable sections. They show the model's step-by-step reasoning process. Click to expand or collapse.
Tool Call Cards
When the AI invokes a tool, a collapsible card shows:
- Tool name and plain-English description
- Input summary
- Result (once complete)
- Spinner while pending, green check when done, red indicator on error
- Undo button for file-write tools -- prefills the chat input with an undo instruction
System Messages
Status messages appear as small pills in the conversation:
- Error -- something went wrong during the response
- Interrupted -- the response was stopped by the user
- Context Compacted -- older messages were summarized to save token space (amber banner)